Ornaments can last for decades, which makes sense, seeing as
they’re only used once a year. For this reason, they also tend to become
outdated and aged before finally being abandoned without a second glance.
Luckily, they’re relatively easy to update for less than the cost of buying new
ornaments. Creating your own ornaments
can be a fun project for the day with a friend or some family, but it does take
time (read: a lot of waiting for paint/glue to dry). So get on your creative
cap, and give your old ornaments the personal touch. Here are some ideas to get
your juices flowing:
The Shopping
List:
Mod Podge
(Gloss)
Acrylic Paints (in colors of your choosing)
White
Glitter
Ribbon
Typed on
Paper
Sharpie
Paint Pens
Paintbrushes
Old or Used Ornaments
Pen or
Pencil
Ornament #1:
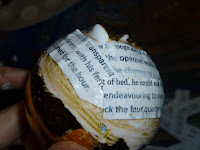
This ornament was inspired by my boyfriend’s sister who used
sheet music instead of words. This ornament definitely requires patience. Begin
by cutting sheets of paper into small strips. I recommend making them no longer
than an inch and a half in length (any longer, and you’re going to be fighting
the paper to lay flat on the ornament). Paint a layer of Mod Podge over clean
bulb with top removed. Place strip of paper on ornament gently and brush edges
down with more Mod Podge. Continue until bulb is covered. Allow to dry. Mix Mod
Podge with white glitter and paint over entire bulb. Allow to dry. Decorate
further with Sharpie paint pen and ribbon.
Place top back on bulb and hang on tree.
Ornament #2:
 Take two different colored bulbs that you no longer want,
place them in a paper bag and
 crush them using your shoes. Repaint a third bulb whatever color you desire (I recommend using a lighter color though, to offset to mosaic print you will be making), after removing the top, of course. Allow to dry. Using Mod Podge, glue bits of broken ornament in a mosaic print around a little over half of bulb. Allow to dry. For this bulb, I took a Sharpie paint pen and created a swirling design on the top part, but I think I’d prefer covering the whole ornament with the mosaic print next time. Paint over with more Mod Podge and allow to dry. Place top back on bulb and hang on tree. =)
Ornament #3:
Remove top of ornament and paint all over in desired color.
This will probably require two coats. Allow to dry. Trace shape on back side of
paper and cut out. Glue shape onto ornament and trace with Sharpie paint pen. I
decided to mix the Mod Podge with more glitter and paint over the entire bulb
again, but next time I’d paint over it without the glitter. Allow to dry, put
top back on ornament, and hang on your tree.
When I get more time, I think I’d like to paint wintry
forest scenes on the bulbs, or play with buttons on the ornaments! There are
plenty of different things you can do for this DIY.
15 Days Until Christmas!


No comments:
Post a Comment