Wednesday, December 12, 2012

Gift: Popcorn Tin


Most everyone has received a popcorn tin at some holiday function at some point in their life; and everyone knows the only palatable of the three options is the carmel corn. Seriously, I may be able to understand the white cheddar, but that “buttered” yellow crap is…crap. So why don’t we do everyone a favor—while reusing an old gift—and make our own popcorn tin? An all carmel popcorn tin.

But before I get too far ahead of myself, we’ll need to start with a tin. You can get these from thrift stores fairly cheaply, or you can reuse one you’ve already been given this season. Either way, you can revamp the tin easily (since, if you’re anything like me, you tend to not be a fan of the prints on these tins.).

The Shopping List:
Mod Podge (Gloss)
White Glitter
Paintbrush
Sheet Music (one page)
Cut-out Snowflake Stencil
Gift Wrap
Popcorn Tin
Ribbon or Bow (optional)
2 Pieces of Construction Paper

First, thoroughly clean inside and outside of tin, to get rid of all those nasty salts left behind from the previous popcorn. Dry with a paper towel.

Cut out strips of wrapping paper to fit tin. The larger the strips, the more difficult to get them to lay flatly on the tin, but the more strips, the more lines you have. To off-set this, you could decide to do a quilted design, alternating different types of wrapping paper as you go.

Spread Mod Podge thinly over backside of wrapping paper and lay onto tin. This requires an extremely gentle touch. I recommend smoothing the paper down from the center and working your way outwards and upwards. Fold the leftover paper over the top of tin, add extra Mod Podge to edge, and press down. Allow strip to dry for a few minutes.  Continue this process until all of the strips have been applied. If you desire, mix Mod Podge with white glitter and thinly paint over wrapping paper. This will give a glittery gloss to the tin, but it will alter how the tin feels (due to the glitter).
 
While you wait for the tin to dry, use a snowflake stencil and trace onto the backside of a sheet of music. I made my own stencil by searching snowflake images on the internet, printing it off, and cutting it out.

Cut snowflake from sheet music and Mod Podge backside onto the tin’s lid. Allow to dry one or two minutes. Once dry, mix Mod Podge with white glitter and paint over lid.

I still had the divider for my tin, so all I did was wipe it off and place it back inside.  If you don’t have one, make your own by folding to pieces of construction paper together. Line them up and glue half of each paper together. Fold the other halves in opposite directions to make a “Y” shape.


Voila! Your very own popcorn 
tin! =) Stay tuned for some delicious carmel corn recipes to put inside your tin.

14 Days Until Christmas!

Monday, December 10, 2012

Decor: Christmas Ornaments


Ornaments can last for decades, which makes sense, seeing as they’re only used once a year. For this reason, they also tend to become outdated and aged before finally being abandoned without a second glance. Luckily, they’re relatively easy to update for less than the cost of buying new ornaments.  Creating your own ornaments can be a fun project for the day with a friend or some family, but it does take time (read: a lot of waiting for paint/glue to dry). So get on your creative cap, and give your old ornaments the personal touch. Here are some ideas to get your juices flowing:


The Shopping List:
Mod Podge (Gloss)
Acrylic Paints (in colors of your choosing)
White Glitter
Ribbon
Typed on Paper
Sharpie Paint Pens
Paintbrushes
Old or Used Ornaments
Pen or Pencil

Ornament #1:
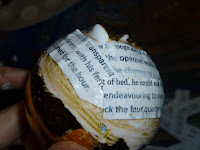
This ornament was inspired by my boyfriend’s sister who used sheet music instead of words. This ornament definitely requires patience. Begin by cutting sheets of paper into small strips. I recommend making them no longer than an inch and a half in length (any longer, and you’re going to be fighting the paper to lay flat on the ornament). Paint a layer of Mod Podge over clean bulb with top removed. Place strip of paper on ornament gently and brush edges down with more Mod Podge. Continue until bulb is covered. Allow to dry. Mix Mod Podge with white glitter and paint over entire bulb. Allow to dry. Decorate further with Sharpie paint pen and ribbon.  Place top back on bulb and hang on tree.

Ornament #2:
Take two different colored bulbs that you no longer want, place them in a paper bag and 
crush them using your shoes. Repaint a third bulb whatever color you desire (I recommend using a lighter color though, to offset to mosaic print you will be making), after removing the top, of course. Allow to dry. Using Mod Podge, glue bits of broken ornament in a mosaic print around a little over half of bulb. Allow to dry. For this bulb, I took a Sharpie paint pen and created a swirling design on the top part, but I think I’d prefer covering the whole ornament with the mosaic print next time. Paint over with more Mod Podge and allow to dry. Place top back on bulb and hang on tree. =)

Ornament #3:
Remove top of ornament and paint all over in desired color. This will probably require two coats. Allow to dry. Trace shape on back side of paper and cut out. Glue shape onto ornament and trace with Sharpie paint pen. I decided to mix the Mod Podge with more glitter and paint over the entire bulb again, but next time I’d paint over it without the glitter. Allow to dry, put top back on ornament, and hang on your tree.
When I get more time, I think I’d like to paint wintry forest scenes on the bulbs, or play with buttons on the ornaments! There are plenty of different things you can do for this DIY.


15 Days Until Christmas!

Sunday, December 9, 2012

Decor: Christmas Candles


Christmas is a time for warmth and light, so what better way to add some festive decoration to your house than with holiday candles? Here are four ways to create your own decorative Christmas candles.


The Shopping List
4+ Tea Lights
½ Bag Fresh Cranberries
White Glitter
5 Cinnamon Sticks
White Styrofoam
3 Glass Jars
Clippings from Christmas Tree
Peppermint Essential Oil
Ribbon
Super Glue or Hot Glue Gun

Candle #1:
Take jar and fill almost to top with cranberries. Place tea light in middle and surround edges with cranberries, leaving room for two cinnamon sticks. Sprinkle with ground cinnamon for an espresso looking candle. Decorate with ribbon.

Candle #2:
Fill jar ½-¾ way with cranberries. Sprinkle a thick coat of white glitter over top, along with 10 drops peppermint essential oil.  Add water to jar until cranberries have almost reached the surface. Add two sprigs of Christmas or similar tree. Place tea light in jar and decorate with ribbon (optional).

                                                      Candle #3:
This was inspired by a friend of mine who used three traditional sticks and had this design for her nativity. I use cinnamon sticks for the smell. Glue two cinnamon sticks into a slightly overlapped “V” and allow to dry. Take a third cinnamon stick and glue over the ends of both cinnamon sticks, creating a sort of triangle; allow to dry. Place tea light on top.

Candle #4:
Poke three sprigs of Christmas of similar tree into Styrofoam and hot glue to bottom of jar. Pour 1-2Tbs of glitter onto bottom. For extra greenery, pull clusters of pine from another sprig and drop into jar.  Add 10 drops of peppermint essential oil. Fill almost to the rim with water and add tea light to top. Use ribbon to decorate.

There are tons of other ways to decorate candles for around your home or office, so experiment and have fun!

16 Days Until Christmas!

Friday, December 7, 2012

Decor: Stringed Popcorn


For several years of my childhood, my parents took the easy route when it came to trees and tree decorating. In the late 1980s, my parents purchased an enormous (and painfully prickly) fake tree, and for several years we decorated it in the same way: random bulbs given as gifts, handmade ornaments from my siblings and my elementary grades, singing light bulbs, and garish sparkly red tinsel. The tree was a mess. So when my parents finally succumbed to my sister and my complaints and we started chopping down our own fresh, real trees I knew then was the time for a big move. I grabbed that garish tinsel from our box of Christmas decorations, and I told my mom that it was not, in any way whatsoever, going on our tree.

Now, let me be fair, the tinsel wasn’t that bad—you could even call it pretty—I just despise tinsel on trees. For some reason or other, I see tinsel on a tree and I think, “Trying too hard.” It just takes away too much from the natural beauty of the tree. I’d rather wrap that sparkly puff string around our banister, or line the fireplace with it, than use it to overdress a perfectly stunning tree. But a tree with only lights can be a little too plain.

That year (and ever since) my mother and I compromised by performing a classic and simple DIY tree decoration: stringed popcorn. It’s a modest but quaint way of dressing up a tree while adding a homemade, cozy touch. I’ve recently gotten into adding a bit of flair to the popcorn by using fresh cranberries for a pop of color on the string. This is a simple, yet fun holiday tradition to involve the whole family with—only, turn on a favorite Christmas film before you start so that the time passes by more quickly.

The Shopping List
1 Bag Fresh Cranberries
4 qts Popcorn (you may need more to eat as you string)
Fishing Line
Needles
Scissors  

Start by cutting a long string of fishing line. How much you need really depends on your tree size, but I say at least 15-20 feet will be needed. You can choose to cut smaller sections of string (at least 5 ft a string), and overlay them on the tree so that they look like they run together (as you would do with lights…or tinsel).

Tie off one end in a quadruple knot. This helps to ensure a secure end that nothing will slip off of. Thread your needle using the opposite end of the line. Begin stringing popcorn by gently poking through the popcorn and pulling the popcorn toward the line. Tip: Sometimes while stringing the popcorn can split, resulting in a lot of wasted effort. Determining where to poke through the popcorn is essential. Never try to poke through the brown kernel, and always try to go through a substantial amount of the puffy white bit. Avoid creases in the popcorn as well, because they’re weaker spots. If there are any naturally occurring holes, use them to your benefit, they tend to be secure.


String popcorn and cranberries however you desire. For this line, I did a rotation of two popcorn pieces for every cranberry, but you can be as random or creative as you want. Want buttery looking popcorn? Sprinkle your bowl with turmeric and mix. Want more variation? Get mini marshmallows in different colors and string them as well. Just have fun with this festive DIY!


After your string is complete, tie off end in another quadruple knot and hang on tree. We don’t have our tree yet, so for now I’ll hang it on me (for this photo at least).


18 Days Until Christmas!

Thursday, December 6, 2012

Treat: Spiced Hot Apple Cider


Fall is fading quickly into winter here in Washington state, but there are still plenty of apples left over from the harvest. This means, if you grow your own, you are quickly trying to use your apples up in any way possible (canning, apple sauce, apple butter, pies), giving them away, or leaving them as compost for next year’s crop. If you don’t grow your own, most stores are putting this season’s yield on sale, and praying you don’t complain of their mealiness.

One of my favorite ways to use apples that are turning mealy faster than I can consume them, is to turn them into a mug of piping hot, spiced cider. While this treat may initially trigger notions of Autumn, it is still seasonally appropriate—keeping you warm and smiling as you slowly sip it away.

The Shopping List
Appx. 40 Apples of your Choosing
1 inch Thumb Fresh Ginger
6 Sticks of Cinnamon
1-2 tsp. Whole Cloves
Nutmeg (to taste)

To make your cider, take a sack of apples (appx. 40 apples will make about 4.5 qts) and turn them into a mountain of chopped and cored apples. I like to call it, Mt. Cidernai (get it, Mt. Sinai? No? That’s okay, I never actually call it that.)


Juice apples and ginger in your handy dandy juicer. If you don’t have one, you can experiment by slowly squeezing the chunks of apple between two large volumes of never-read literature. Or you can buy apple juice from the store and add powdered ginger to taste. Pour juice into pot and turn to medium heat. Add cloves and cinnamon sticks.


Bring juice to a gentle simmer (it shouldn't get to a boil). Allow to simmer for about 15 to 20 minutes, testing cider every now and then to see if the spice is to your taste. Adjust spices if necessary. Once the flavor is satisfactory, pull from heat and strain. My family prefers the cider to still have the fibers from the apple juice, so I don’t strain. I’ll either pick the spices out, or ladle around them. Once in mug, sprinkle with nutmeg and drink immediately. =)


This can be refrigerated for 3-4 days and reheated in the microwave or on stove.


19 Days Until Christmas!

Wednesday, December 5, 2012

Gift: Orange Cream Face-icle


When I was a little girl, one of my favorite things to do was to sneak into my mother or older sister’s stash of toiletries, grab whatever I could find, and concoct my own beauty products from them. This often involved mixing facial cleansers with Nair and green food coloring. I’d then repackage the potion and give it to one of them as a gift. Thankfully, they never used said items; and with time I grew out of my “scientist” phase.

Over the past few years, however, I’ve become more and more of a naturalist—particularly when it comes to my skincare routine. I love the pleasure that comes with making my own beauty products, to say nothing of the improvement in my skin’s texture, moisture, and radiance. Like I said in a previous post, I typically wash my face with straight honey and then moisturize with almond oil, but every now and then I sit down and make something more complex for my face. Since I recently decided to treat myself and purchase a skin butter sampler from Camden Grey, I figured now would be a good time to return to my beauty product experimentation—only this time with raw ingredients, making skincare items you can actually use. (Warning: be prepared for a ton of beauty related DIYs).

This fragrant facial cream is a perfect complement to myLand of Milk & Honey Mask, since both feature a heavy orange smell.  It can be worn night or day; but if you’re a makeup lover, you might prefer using it at night only, since I don’t know how it would mix with foundation. A little of this goes a long way, and is designed to melt on skin contact. I recommend dividing this cream into smaller containers for gifts to more friends.

The Shopping List
2 oz. OrangeButter (oh wow, this stuff smells great!)
3 tsp. Apricot Oil
1-2 oz. Containers for Storage, or 1 Small Jar

Orange Cream Face-icle:

Start by scooping Cupuaca Butter into a microwavable container, a mug or glass would do finely. Cupuaca is a relatively unknown butter and comes from a tree found in Brazil. It’s reported to reduce dry skin, as well as the development of wrinkles. It also helps restore skin elasticity which aids the prevention of skin degeneration. Cupuaca is a harder butter, so it needs to be melted down to mix it with the other ingredients. Place Cupuaca in the microwave watching until it melts (less than a minute).


Stir in Orange Butter until it dissolves into the Cupuaca Butter. Orange is renowned as a natural cleanser and toner, but it also is anti-inflammatory. And it smells delicious, without having to add any fragrance! Add in Apricot Oil, and continue to stir. Apricot Oil is one of the lightest oils out there, and is known to have intense skin repairing properties. It is said that the Apricot seed (from the pit of the apricot) contains a rare vitamin called Vitamin B17, which is reported to help fight cancer.


Allow facial cream to cool and set, stirring occasionally. Once the cream has a more, well, creamy texture, like this:

scoop into containers, decorate with ribbons, stickers, or markers, and enjoy! I have been loving this cream for the past week. It’s gotten rid of all my dry patches I had gotten on my face while I was down in California. And, did I mention how good it smells?

20 Days Until Christmas! 


Tuesday, December 4, 2012

Treat: Spiced Pudding Cookies


Happy National Cookie Day! I love cookies, almost as much as I love pie, so I don’t really need an excuse to make cookies, especially during the holidays.  Especially, especially when your main source of heat comes from your oven and it’s already 48 degrees outside.

I was first introduced to pudding cookies by a friend of mine who made the most amazing chocolate chip cookies. Ever.  When asked why they were so delicious, she smiled and admitted to putting a packet of vanilla pudding in them. Coming home recently, I spotted a packet of Jell-o Cheesecake Pudding on the counter. Immediately plans of delicate cheesecake flavored cookies sprang to my mind, only to quickly be forgotten—until today. And because it’s winter and the holidays and all of that splendor, I decided to spice them up, because, well, I like spice.  This recipe was a complete experiment, but they turned out fairly well. Well enough to share. =)  I will say though, that the spices overpowered the cheesecake flavor, so I think vanilla would have turned out just as well.

Recipe:

Ingredients

2 ¼ cup all-purpose flour
1 tsp. baking soda
¼ cup white sugar
¼ cup brown sugar
11 grams instant cheesecake pudding
½ cup cinnamon Graham Cracker cookies, crushed (optional, for a crunchier texture)
2 tsp. cinnamon
1 tsp. nutmeg
½ tsp. ground clove
½ tsp. ground ginger
1 cup butter
1 tsp. vanilla extract
2 eggs

Preheat oven to 375 degrees Fahrenheit. 

Combine dry ingredients in bowl and mix thoroughly. 


In separate bowl, soften butter. Mix butter with wet ingredients and combine into bowl with dry ingredients.


 Roll dough into appx. 1 inch balls, flatten to desired shape of cookie and place on cookie sheet.


 Flattening these cookies is incredibly important—they keep whichever form you put them in. Put into oven for about 9-10 minutes. When you remove them from the oven, they should look slightly undercooked.  Remove them from cookie sheet to cooling rack immediately to avoid the bottom of the cookie from cooking further, and let sit to cool. These cookies taste better colder, for whatever reason, so I don’t recommend eating them hot from the oven. 

Once cool, refrain from scarfing them down in one sitting. You can wrap them up in plastic with ribbon ties for an individual gift to someone, or bring them to a party. Whichever you choose, share them, please. =)

21 Days Until Christmas!